How to set-up a Facebook Business Page the RIGHT way!
Learn how to grow your business brand using social media by creating a professional Facebook Business Page the RIGHT way!
In these unprecedented times, and with people all across the world being isolated in their homes, the digital space has become their link with the outside world.
More than ever before, consumers rely on the internet and digital platforms like Facebook, Google, Instagram, LinkedIn and Twitter to stay informed and entertained.
For your business brand, social media sites, websites, and eCommerce stores are more than just the face of your business; they become a crucial marketing and sales tool designed to engage with your customers.
Facebook now has over 2.23 billion monthly active users.
For small businesses and a consumer brand, there’s a GOOD chance you’ll be able to reach, connect and interact with your target audience using a Facebook Business Page.
We’ll show you how to set-up your Facebook Business Page the RIGHT way, using all the set-up components correctly to get the BEST results (Not built by your mates friend’s brother).
How to create a Facebook Business Page
Let’s dive into how to create a Facebook Business Page by following these simple steps to launch your page by the end of the day.
STEP 1: Register for your Business Page
Take some time to work out what your Facebook Page name should be.
This is what people will use to search for you on Facebook. You might need a few options in case the name you want is not available.
Use this link to register: https://www.facebook.com/pages/creation/
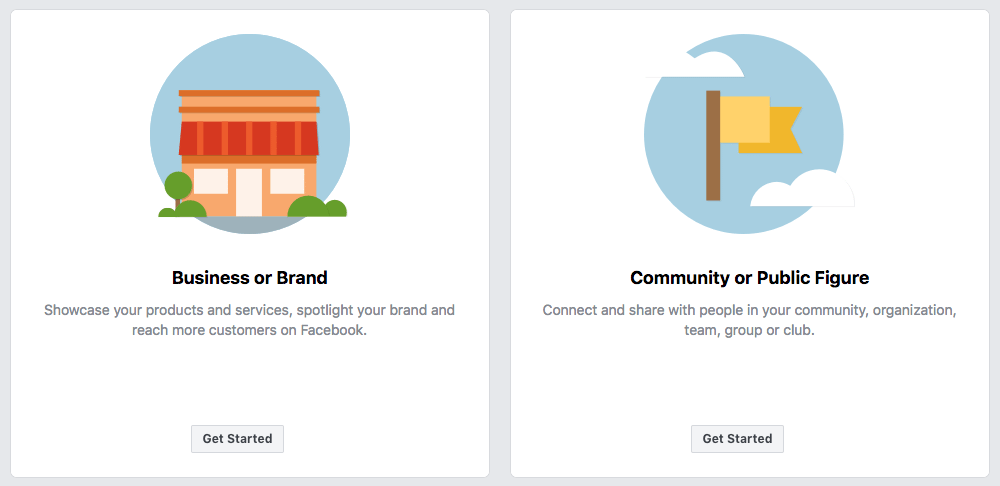
Next, enter your business information:
• Page Name
• Business Address
• Phone Number
• Categories
Your business category is important. Type a word or two that describes your business and Facebook will suggest some options. If your business falls into more than one of the category options, choose the one your customers are most likely to think of when they think about your business.
STEP 2: Add your pictures or graphics
It’s the images that you use that really make your Facebook Page stand out.
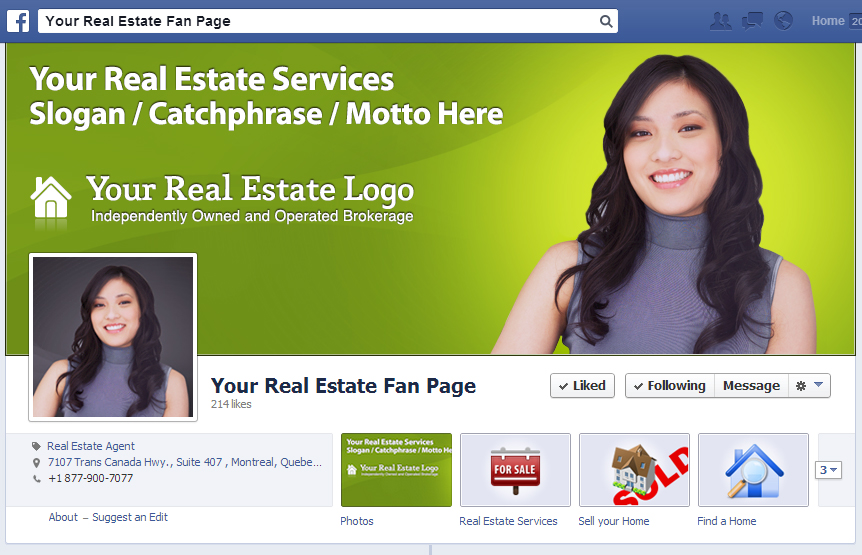
It’s essential to create a good first impression, so choose carefully. Make sure the photos you choose will align with your brand strategy and message and are easily identifiable with your audience.
You’ll need to upload a profile image first, and then a cover image.
This image will accompany your business name in any search results, so it’s a good idea to have a relevant image name before you upload it. You can use an image OR a video!
Canva is a great (free) tool that makes the creation of graphics much easier.
If you have a recognisable brand, you can probably use your logo or a graphic you may have used on your website. If you’re a personality or public figure, a selfie might be best.
The skeleton of the Facebook Business Page is in place, you’ve still got some work to do before you share it with your audience.
Don’t stress. Your page isn’t visible to the public yet; we’ll do this later in step 8.
STEP 3: Complete your Page Information
Go to the Settings or the Edit Page Info option and start to fill out all the page information. In this section, there are a series of tabs for you to work through.
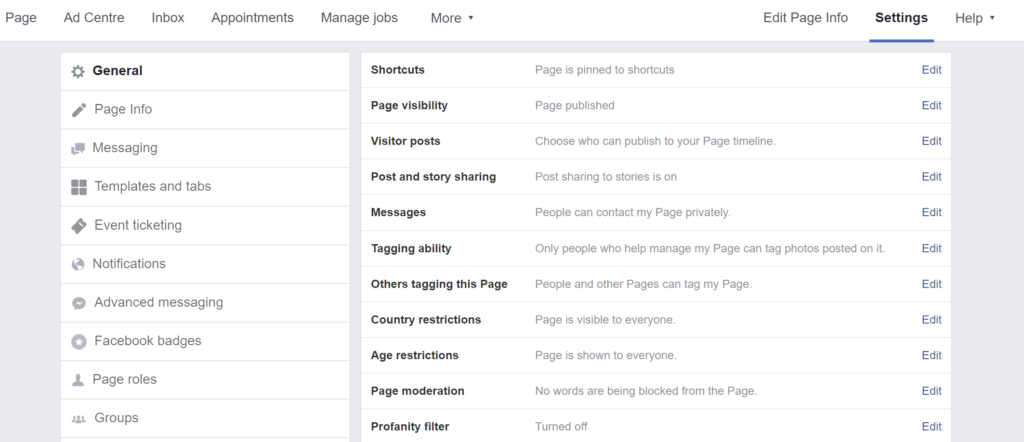
This information should be populated as it adds weight to the authenticity of your page and also aids in its searchability.
Skip over the General Option, this gets a bit technical, and we will cover this later in the article.
Let’s begin with page Info as this required much of the information you will have on hand.
If you haven’t yet created a Brand Message and Positioning, we recommend you do this first. DOWNLOAD our FREE Brand Strategy Development Guide to help with this.
Description: Enter your company profile or brand story.
Categories: Choose up to three categories that suit what your business does.
Contacts: Populate your business details.
Location: If you have a physical store, enter your address here into the map.
Hours: Provide your trading hours.
More Section: In this section, you can enter some advanced details about your business. Use the Products to highlight specific products or services.
Privacy Policy can simply be a link to your website policy.
Take the time to get this information right.
The more you provide, the better your page will work. This information will appear on the About tab of your Facebook Page, where you can add even more information, such as your business’s story, awards, menu,
Templates and Tabs
You might have noticed that some Business Pages have different fields available and also can have a slightly different layout/style. Facebook allows you to choose a template based on your business type. Depending on your template, it turns on fields such as your business’s story, awards, menus etc.
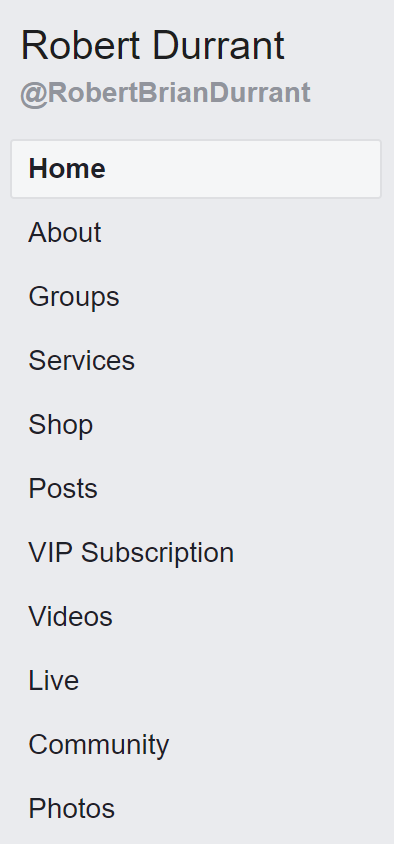
In this section, you can also enable or disable and re-order the tabs that appear on the Facebook Page e.g. About, Groups, Services, Products, Shop, Posts etc.
You can edit these at any stage later, BUT, it’s important to resist changing templates constantly.
Messaging and Advanced Messaging Options
Use this feature and edit the preferences for managing your messages across Messenger and Instagram. You can manage notification settings in the Notifications tab.
You can choose a series of pop up questions that your customers will see when you are offline.
Advanced Messaging option is more suited to when you’ve installed a Facebook Messenger service to your website or third party application. Here you can whitelist those website domains during the set-up of those services.
Notifications
Set what type of notifications you will receive when people interact with your page.
Page Roles
Everyone who works on your page can have a different role depending on what work they need to perform. Use this section to manage those profiles
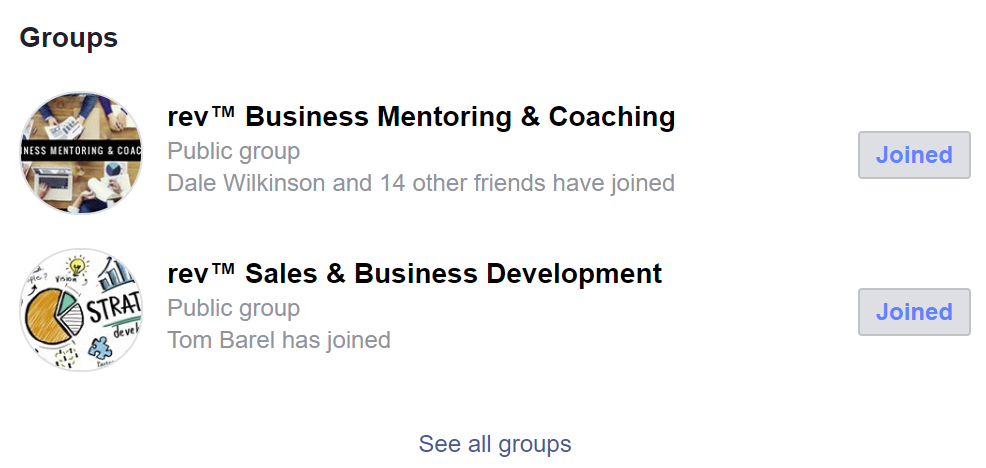
Groups
You can create specialist groups as part of your Facebook page e.g. a VIP Club or Discussion Topic. Use this section to manage roles within your Facebook Groups. Admins, editors and moderators can manage all groups linked to this page. Any admin can change who manages these groups.
People and Other Pages
Here’s where you can see and edit the people that like your page.
Issue, Electoral or Political Adverts
There are certain restrictions for advertising on Facebook. In this section, you can become authorised for these restrictive topics.
Instagram and WhatsApp
Provide your username and passwords to connect these apps using this section.
Likes
Add up to five pages that you can specify as featured Liked Pages on your page.
Add pages to crosspost
Crossposting allows you and another page to post videos on each other’s behalf.
Page Support Inbox
This is where you can check the status of support requests
Appointment Settings
One of the new features on Facebook allows customers to book a discussion time with you. Use this section to set-up and edit your availability, message settings and services.
Linked Publications
Help readers find your latest articles by letting publications connect bylines to your public Facebook Page.
General Options
We’ve left the General option until last because this is focused on advanced page customisation.
I wouldn’t recommend you change too much in this section, but it is worth stepping through each option to ensure it is configured to what you want from your page in areas of visibility, engagement and of course, security.
STEP 4: Provide content for the Our Story section
Let’s move to your Facebook Business Page by pressing the Page Option on the menu.
Looking at your page, on the right-hand side of the page you will see a section called Our Story. Add in your brand story and history, also an image that represents your business.

STEP 5: Add an action button to your page
Facebook Business Page gives the option to add an action button to your page, which will appear in the top right-hand of your page. This acts as your page’s call-to-action and is free to use.
Including a relevant action can help generate more leads and interaction. To do this, click the blue “+ Add a Button” option on the left-hand side of your page below your cover image.
STEP 6: Let’s set-up your Shop and Services
If you have chosen these tab options under Templates and Tabs in Step 3, then they will appear as a Facebook page tab.
Shop – Enter any products you are currently selling on your website or third-party eCommerce marketplace. Populate the description, price and image and enter your check-out URL (e.g. your online payment gateway or website store where people pay)
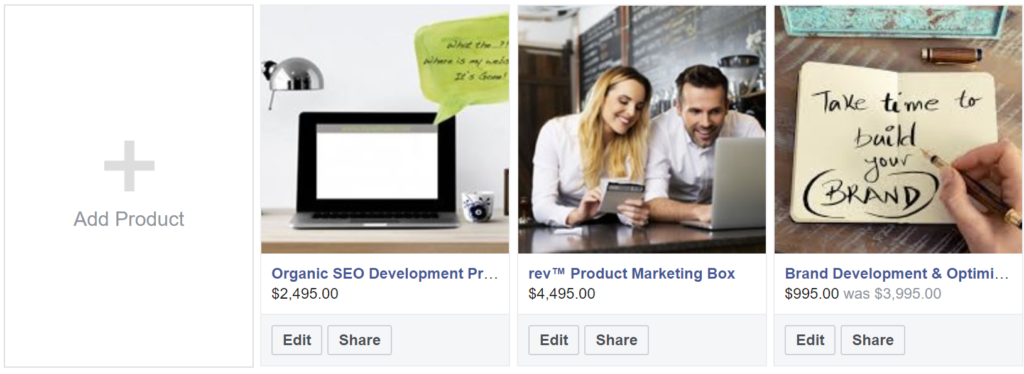
Services – Populate any service options that you provide in this section. Enter the service details, and a link for more information or to book something with you e.g. to your website store or contact page.
Remember that these options allow you to expose your products and services to the entire Facebook community, so take advantage of it.
STEP 7: Let’s publish your first post
Facebook is all about regular posts and how your audience engages with them.
You can simply add a post and an image using the Write a Post section.
However, Facebook gives you some Publishing Tools, which give you more flexibility around your creative design, digital assets and also post scheduling. Find this option under the drop-down More option.
TIP: you can pin a post to the top of your Facebook Feed, so it stays in front of your customer’s eyes longer.
STEP 8: Publish your Page
Go to Settings – General – Page Visibility option allows you to publish your page and have it visible and appear in search results. This is when you want to go LIVE!
Step 9: Promote your page to your friend’s network
Facebook will prompt you to invite your current Facebook friends from your personal account to like your new Facebook Business Page.
Existing Facebook friends can provide an excellent initial base of likes for a new Facebook Business Page, so it is advised to go ahead and do this using the Invite Friends option from your main page.
It’s a great idea to customise the message you send to these people (so it doesn’t look corny)
Step 10: Market your Facebook Page
You will need to be active on Facebook in order to market your page and grow an audience effectively. Be consistent with your posts and interact with your audience using comments and messages. Using Groups is another way you can engage with people on interest topics.
Facebook Advertising allows you to target audiences on Facebook using paid advertising. These can be an advert or a promoted post that you have previously posted.
Speak with us about how to set-up your first paid campaign [Learn More]
Step 11: Keep improving your page performance
Use the Page Quality and Insights tools under the More option at the top of your page to see how people are engaging with your business. Here you’ll see how many people you’re reaching with your posts and which content they like best.
Understanding how your page is performing can also help you to define a better content and brand marketing strategy. Use these tools to understand in more detail how your audience is using your page.
You are now LIVE on Facebook
Your Facebook Business Page is now up and running, ready to deliver awesome content to your fans and grow into something wonderful.
It’s up to you to make the page a rich and engaging experience for your followers.
Here are a few important items to consider:
1. Switch to the Facebook Business Manager interface. Using this interface to manage your page will provide some advanced page management tools not available through the standard Facebook interface.
2. Install the Facebook Pages Manager app on your phone to help interact and manage your page content on the run.
3. Undertake the free Facebook training. It helps you to understand what you can and cannot do on Facebook e.g. prohibited content
4. Facebook ONLY wants to provide its users with a positive experience. This means that it promotes educational style content as opposed to tricky direct sales messages
5. The more your page is active, the higher it will begin to rank in the Facebook algorithm
6. Facebook is an excellent way to generate traffic to your website. Make sure your website content and shopping experience matches what you have published on Facebook
7. Work with a digital marketing agency to set-up your first paid campaign. They can shortcut the process, and make sure that your advertising and retargeting pixels are all set-up correctly.
Book a Facebook Business Profile Workshop
Our Facebook Business Profile Workshop helps you to grow your business brand online and leverage the most important marketing platform; Facebook. This 4-hour review and improvement workshop will boost your SEO results for your business using a professionally configured Facebook business profile.
Brand Marketing Tools
Brand Healthcheck: Your first step to testing the quality of your online brand against others in the same industry. (Free Service)
Setting up an eCommerce Store: Want to sell your products via your Website? Learn how to set-up or boost the performance of your website eCommerce store.
Brand Optimisation Service: Don’t have the time or expertise to develop and market your brand? This is your outsourced brand development and marketing service. (New customers save 75%)
Website Development Services: Do you need a new more functional website? Or perhaps it just needs a refresh? Let our web services team help.
Website Organic SEO and Marketing Service: Have a great website BUT you’ve not marketed it correctly? Use our website marketing and SEO options help you to build online audiences and website sales.
How to set-up a Google Profile. Learn how to improve your brand visibility on Google and boost your Google Search Engine Optimisation (SEO) results!
If you just need to chat or want to ask a question about using Social Media for your brand marketing, please contact us on +61 3 9863-7444 or email [email protected]
Robert Durrant
rev™ Branding